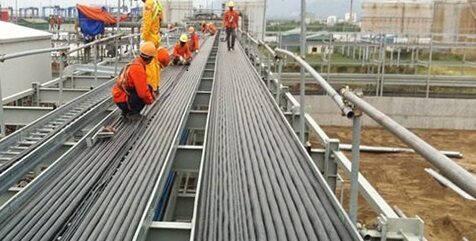
The Best Way To Install A Cable Tray

Installing a cable tray correctly is essential to ensure its effectiveness and longevity in supporting and organizing cables. Here are some key steps to follow for the proper installation of a cable tray:
Plan and Design: Before installation, carefully plan and design the cable tray system. Determine the routing, supports, and necessary accessories based on the specific requirements of your project. Consider factors such as cable load, tray size, environmental conditions, and any applicable codes or standards.
Select The Appropriate Cable Tray: Choose the right type of cable tray based on your specific needs. Cable trays come in various materials (such as steel, aluminum, or fiberglass) and configurations (such as ladder, solid-bottom, or wire mesh). Ensure that the chosen tray is suitable for the
environment, cable capacity, and any specific requirements, such as fire resistance or corrosion resistance.
Prepare The Installation Area: Clear the installation area of any obstructions, ensuring a safe and accessible workspace. Take into account any potential hazards, such as existing electrical equipment, piping, or other utilities.
Install Supports: Begin by installing the necessary supports for the cable tray system. These supports can be wall-mounted brackets, floor-mounted supports, or hanging structures depending on the application. Ensure that the supports are securely fastened and aligned properly to provide adequate stability and load-bearing capacity.
Layout The Cable Tray: Place the cable tray sections in the planned route, making sure they are aligned correctly. Connect the sections using appropriate couplers or connectors. Trim or modify the tray sections as needed to fit the layout precisely. Follow the manufacturer’s instructions for joining the tray sections and maintain proper clearances as specified.
Secure And Level The Cable Tray: Fasten the cable tray securely to the supports using appropriate clamps or fasteners. Ensure that the tray is level and aligned properly along the installation path. Use a level or laser alignment tool to verify the horizontal and vertical alignment.
Install Cable Tray Accessories: Install any necessary accessories, such as bends, tees, crosses, reducers, and dividers, as required by the design. These accessories help in maintaining cable separation, accommodating direction changes, and managing cable loads effectively.
Install Cable Supports And Retainers: Install appropriate cable supports, such as cable ties or cable cleats, within the cable tray to secure and organize the cables. Use cable retainers or brackets to prevent the cables from sagging or coming in contact with tray edges.
Conclusion
By following these step-by-step guidelines, you can master the art of cable tray installation. Adhering to industry codes and guidelines while consulting professionals and manufacturer recommendations will ensure a successful installation that provides efficient cable management for years to come.
